How to Add Google CNAME to a Custom Domain For Blogger
January 22, 2020 | by Admin

How to Add Google CNAME to a Custom Domain
 |
How to Add Google CNAME to a Custom Domain |
I understand that you just started blogging and since you want to go professional want to add a custom domain to your blogger.
Seriously this is the first step to being taken serious as a would-be professional blogger.
Relax I will help you get going in no time.
In this article I will show you how to add your custom domain on Google server, by adding Google CNAME to the Custom Domain. Here Google call it third party domain.
Yes it’s third party since you aren’t getting the domain from Google. This is normal for every corporation. Whenever you move from one corporation to another business entity, either of the corporations can call each other “third party”
Note that if you setup your blog using blogger and you get the domain from Google, you don’t necessarily have to configure the CNAMEs manually as Google will automatically add this.
What is CNAME?
This is an acronym for Canonical Name Record or Name Alias Record.
How to Add Google CNAME Record to a Custom Domain for Blogger?
1. Sign in to Blogger and click on “setting” then “basic”. Well once you click on “Setting” you should see “basic”. Now click on the “+ Set up a third-party URL for your blog“ below the Blog Address.
Look at my screenshot below:
 |
How to Add Google CNAME to a Custom Domain |
Now as you click there a dialog modal opens, asking you to input the domain name that you already bought from this third party, e.g say from Mywebsitemate and click save. If you are in Nigeria, Ghana, and or Kenya, I will advice you to get your custom domain from Mywebsitemate. This platform was design to help Bloggers get and configure their custom domain easily even with free SSL as far as you used Blogger to design your blog. Wow! So visit the site, search for the domain name you wish to buy, signup and during payment choose “offline payment” and then WhatsApp us on +19088381838 to help you complete the payments and then configurations.
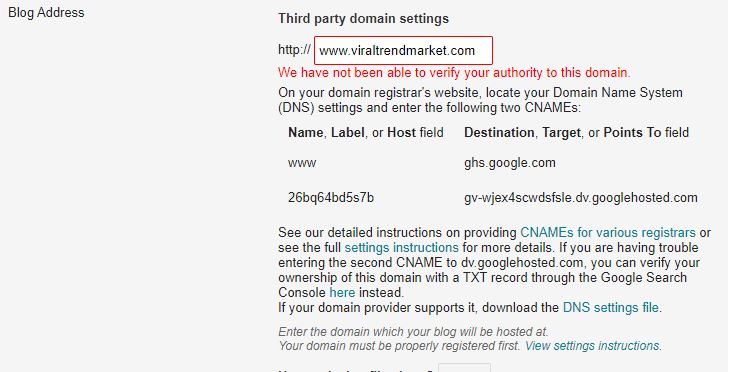
Now note that Google is going to give you an error statement in red “We have not been able to verify your authority to this domain” Don’t worry about that as this is normal.
See screenshot below:
 |
How to Add Google CNAME to a Custom Domain |
Now it’s time to copy Google’s CNAMEs and head to your domain registrar’s Cpanel and add the CNAMES.
How do I get Google CNAMEs?
Google gives two CNAMEs, the first CNAME as general for almost every site hosted on Google, but the second CNAME is unique to each domain to be able to identify them uniquely.
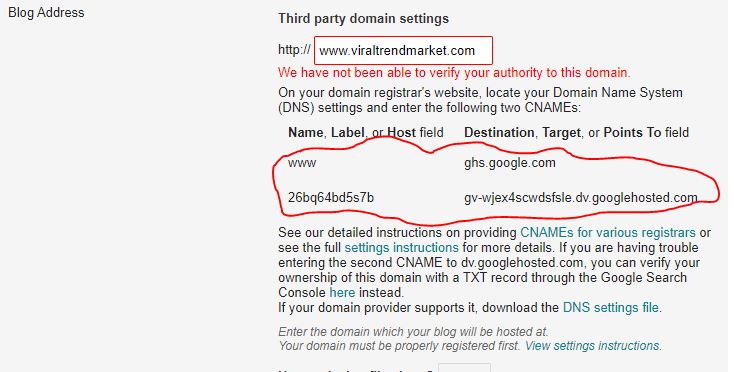
In the screenshot below, have circled the CNAMEs of this domain that we configuring.
Please when using a blogger and wish to buy a domain from a third party, don’t buy hosting as Google is giving you the hosting for free, which is why you need the CNAMEs configuration anyway. Yes you can buy SSL (Secure Socket Layer) from the third party to have a padlock to your site; HTTPS.
And like I said earlier if you used Blogger to design your blog and buy a domain from Mywebsitemate you don’t have to pay extra for SSL, it will be configured alongside.
And like I said earlier if you used Blogger to design your blog and buy a domain from Mywebsitemate you don’t have to pay extra for SSL, it will be configured alongside.
Please let’s continue, look at the screenshot below have circled the CNAMEs:
 |
How to Add Google CNAME to a Custom Domain |
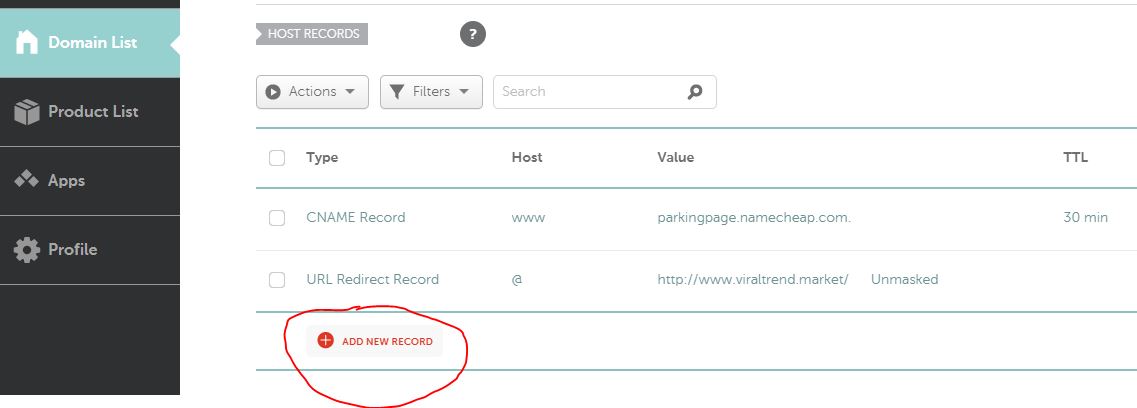
Now here let’s head to the third party Mywebsitemate where I bought the domain, login, click on domains, Advance DNS, and then Add Host Records. See my screenshot below:
 |
How to Add Google CNAME to a Custom Domain |
Click on ADD NEW RECORD and a new dialog modal opens. Create this first CNAME as shown in the screenshot below. In the “Host” field put the “www” or whatever Google gives to you and in the “Target” field put ghs.google.com. Again create another field by clicking on
ADD NEW RECORD
again and add the second CNAME from Google. This time put
“rl5fkudeoklj” in the host field and
| “gv-wjex4scwdsfsle.dv.googlehosted.com” in the target field. Please don’t use this my values, use the one Google gave to you Remember this is just to show you how to. Plus leave the TTL (Time To Live) |
And Please note if your registrar don’t allow you to create two fields
at once, save the first record first, then create the second.
 |
How to Add Google CNAME to a Custom Domain |
Now you are all set. Click save all changes and your custom domain
should be up and running sooner.
See screenshot below:
 |
How to Add Google CNAME to a Custom Domain |
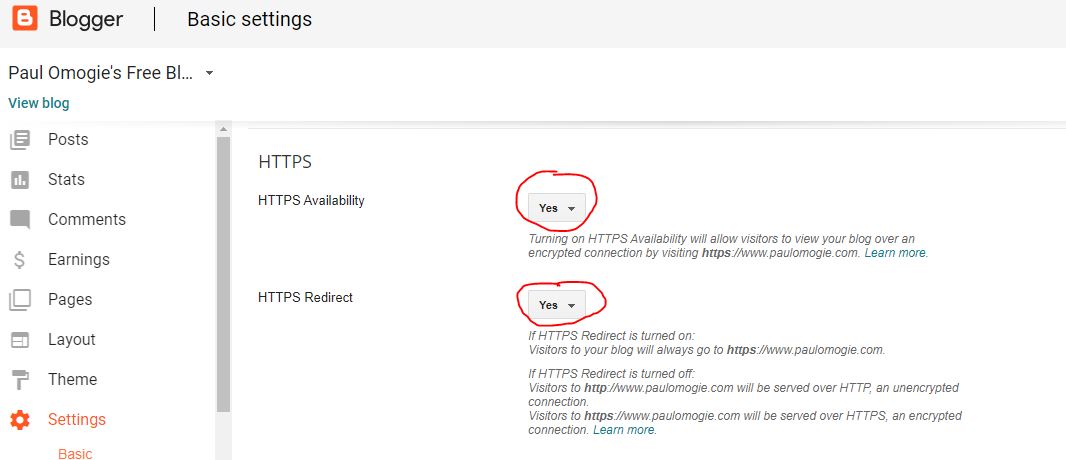
Again choose yes if you paid for SSL, or No if you didn’t, but if you bought your domain
from Mywebsitemate, you can go ahead and still Choose yes as it will work. So
make sure you get your custom domain from there.
from Mywebsitemate, you can go ahead and still Choose yes as it will work. So
make sure you get your custom domain from there.
You see, it wasn’t hard after all. So you get yourself a custom domain and implement this.
Was this helpful? Please use the social media buttons to share and also leave a comment.
For more free training, join our Forum HERE .
I also recommend you read this articles that everyone is reading: