How to Create and Submit Blogger XML Sitemap to Google Search Console and Boost Your SEO (Step by Step)
March 2, 2020 | by Admin

What is XML sitemap?
Simply put, a sitemap is a map of your site or blog. It contains all the URL (Uniform Resource Locator) or links of all the pages in your blog. This determines how search engines can navigate around your site and pull up searches..
It’s important to know that when Google and other search engine crawlers, crawl new domains on the web and your site or blogger don’t have a sitemap, will mostly be left behind and this will affect your SEO (Search Engine Optimization) negatively.
A Sitemap can be in HTML ( HyperText Markup Language) or XML (Extensible Markup Language).
A Sitemap in HTML usually help your blog visitors have a smooth Navigation, while a Sitemap in XML helps search engine crawlers to Navigate your blog smoothly. Note, the key word here is to Navigate and Crawl your blog.
Now let me quickly show you how you can create an XML Sitemap and boost your SEO
First click here, insert your blog URL in the format https://yourblogdomain.blogspot.com or if you have your own custom domain as http://www.yourdomain.com or dot whatever and generate your XML Sitemap just as in the screenshot below:
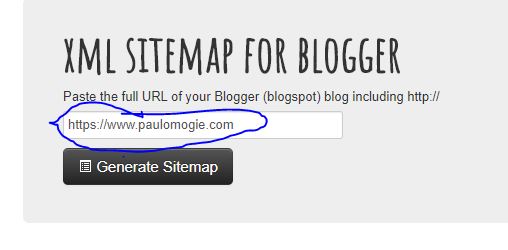
here have put my blog URL as a example, please like I said earlier replace with your own blog or site URL and click Generate Sitemap.
The next XML file will appear. Copy all of it as have showed you again in the screenshot below:
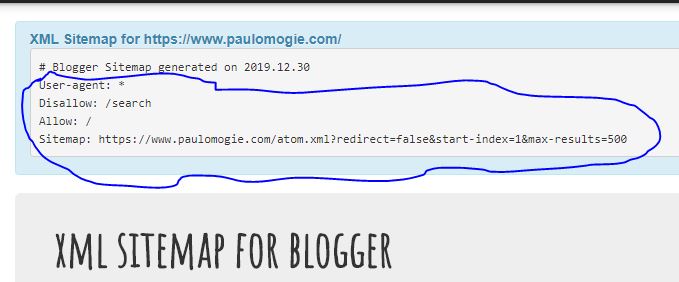
Note: That 500 there means that Google can even crawl up to 500 of your post URLs and pages.
Now go to Blogger.com and login and click on search preferences and click on edit Custom robots.txt and select yes and paste the code in there and click save. Look at the screenshot below:

Now you have an XML Sitemap in your blogger and it’s time we put in the Google Search Console for Google to check and validate to see it we are correct.
So since you are still in your blogger, on that section just before Custom robots.txt you will see Google Search Console. Click Edit to login. Google will want to make sure you have the admin rights to access this feature. See the screenshot below:

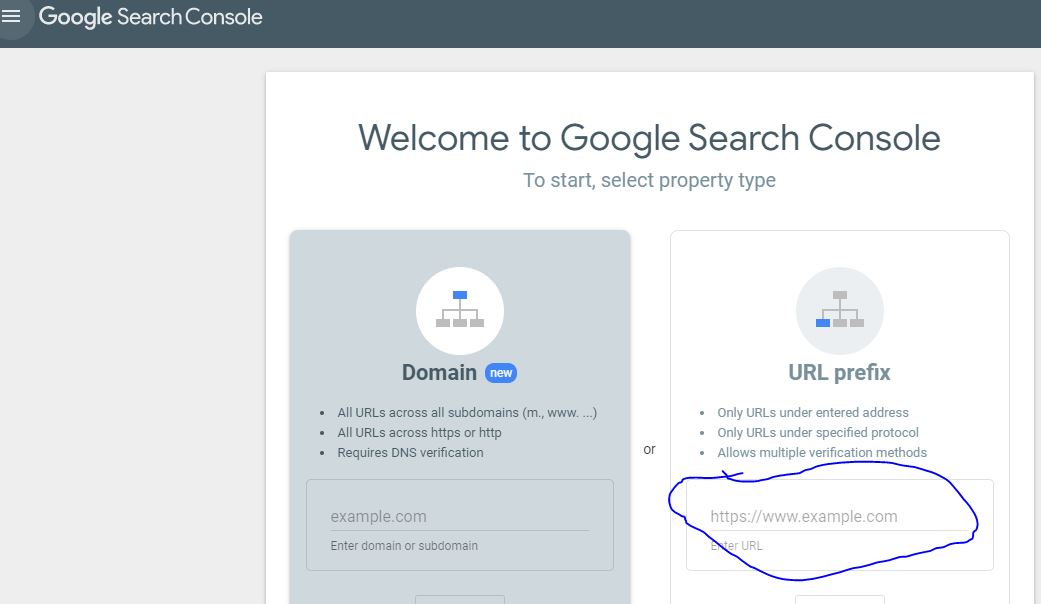
So since you are accessing the console for the first time, google will tell you to add your property and in this case your blog URL, click continue and follow the prompts, validate and add your URL to the Console. Enter your URL as shown in the screenshot below:
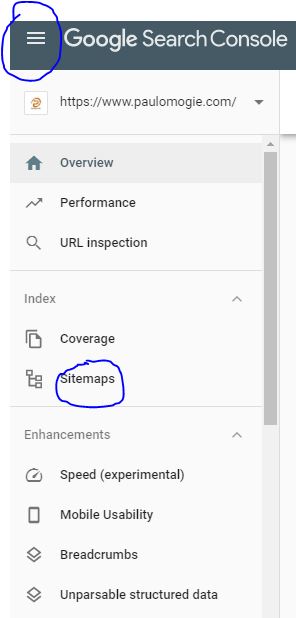
Now on the upper part of the Google Console, click on those three lines as circled in the screen shot below to display Sitemap and then click on it:
Now as you click on the Sitemap, a field is open for you to fill, asking for your Sitemap URL this is all you are putting in that field:
atom.xml?redirect=false&start-index=1&max-results=500
Look at the screenshot below:


Note: If your URL still have the “.Blogspot.com” extension from Google make sure to put it plus atom.xml?redirect=false&start-index=1&max-results=500. Meaning in the Sitemap URL field, you will put your domain URL plus. For example: https://paulomogie.blospot.com/atom.xml?redirect=false&start-index=1&max-results=500 would have been my full Sitemap URL if not that I already have a Custom Domain
Now click submit and if you did everything right, Google will tell you Success and begin to crawl your posts and pages URLs. Congratulations your blogging abilities are getting better.
Was this post helpful? Kindly share with friends and drop your comment below and also don’t forget to subscribe to this blog to get notification when I post the next article on Monetization. thank you
RELATED POSTS
View all

15 Best Chrome Extensions For SEO
June 13, 2020 | by Admin
HOW TO SET A GOOGLE MY BUSINESS PAGE
June 6, 2020 | by Admin